

$147 Big Work Table
A simple assembly table with a big impact
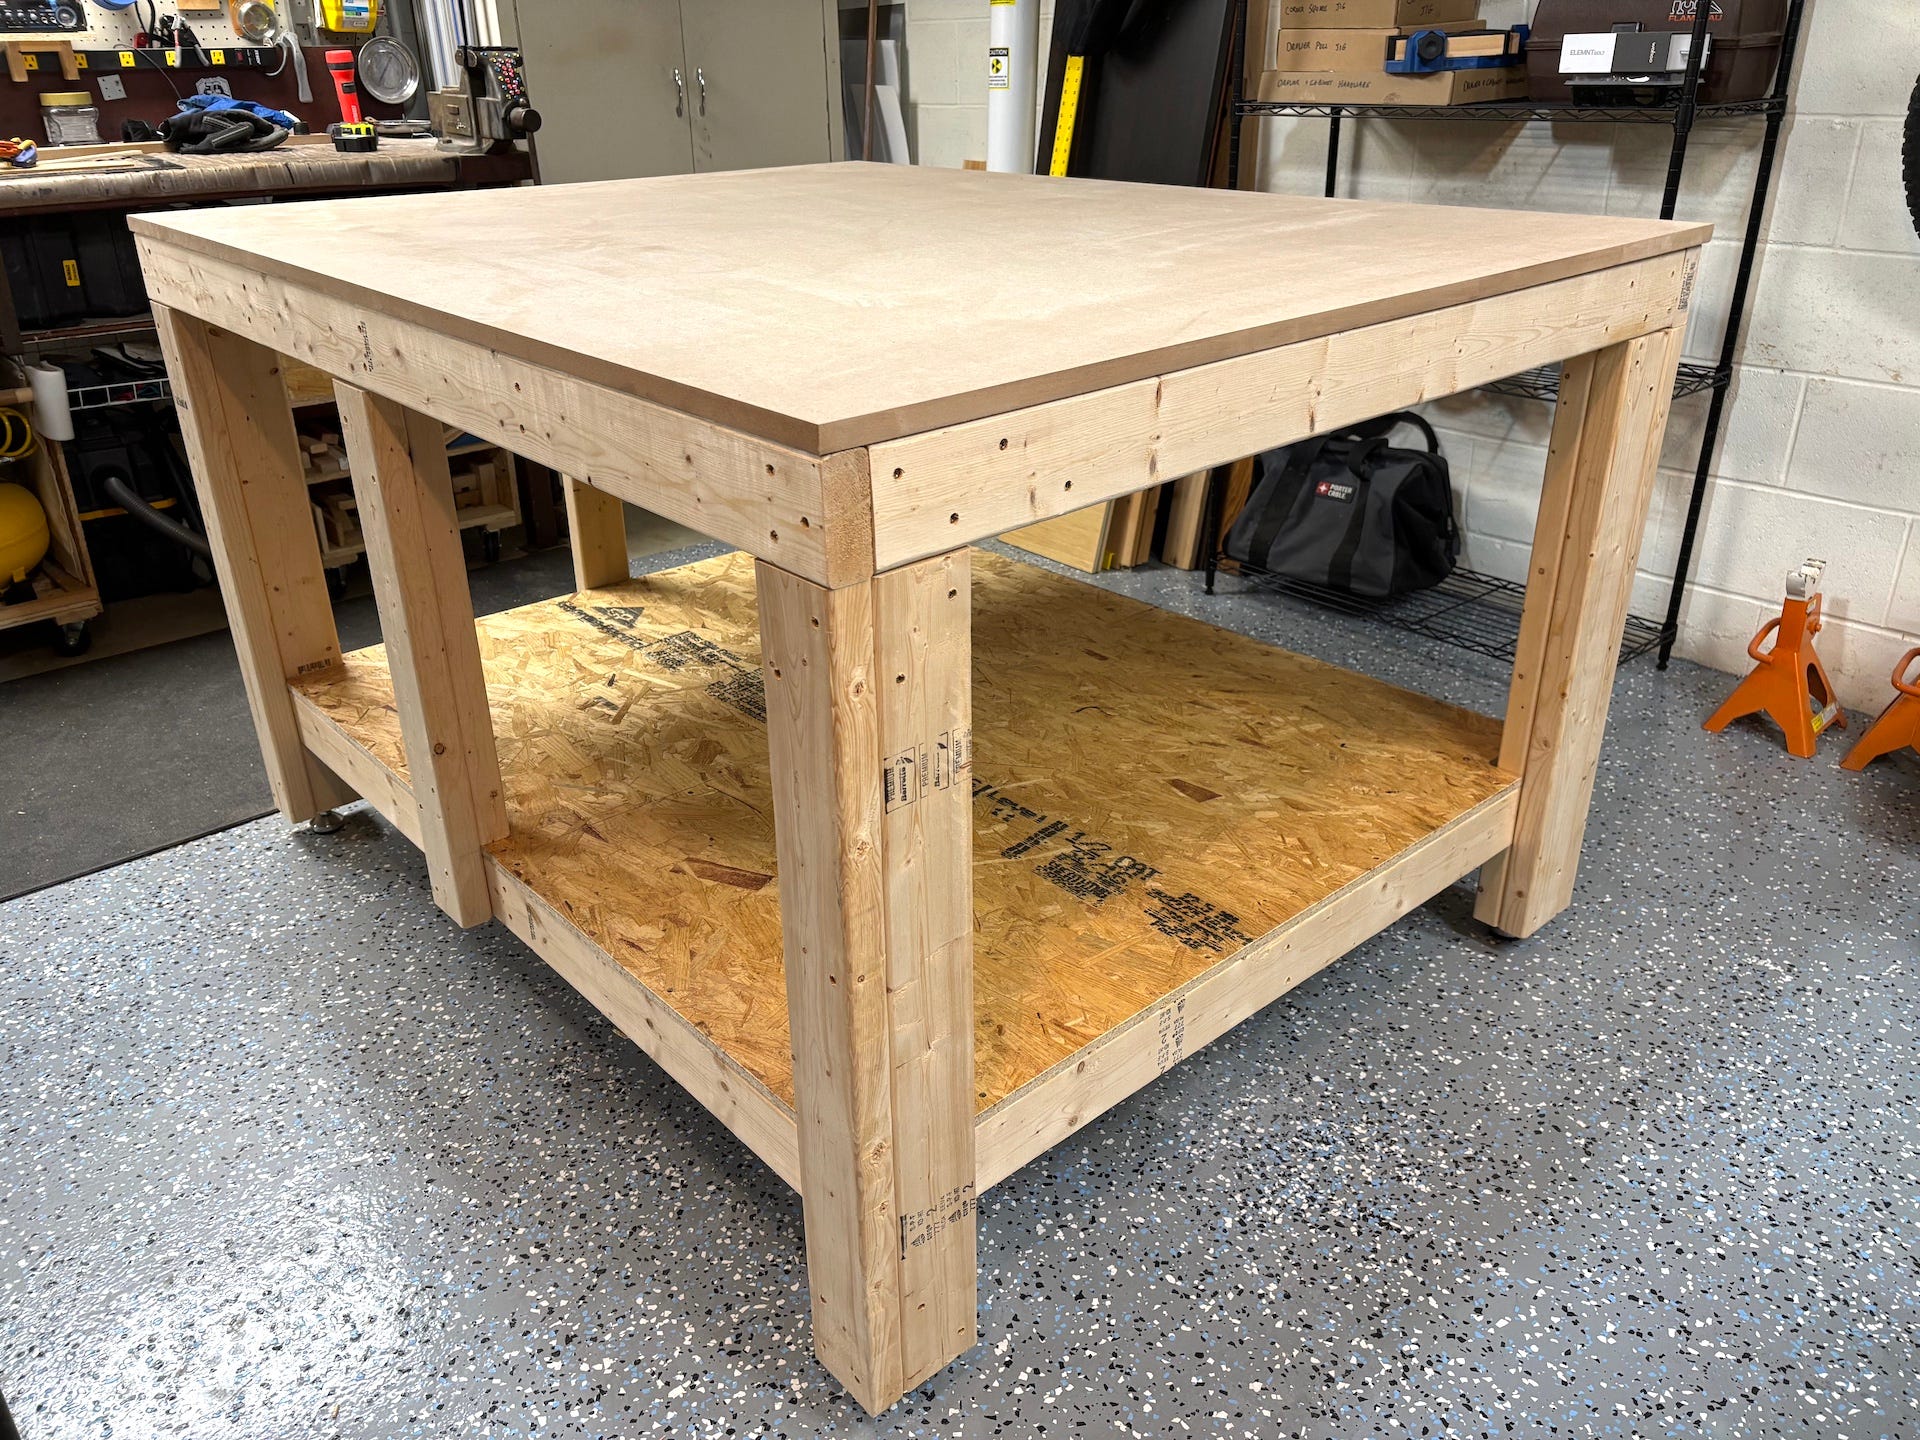
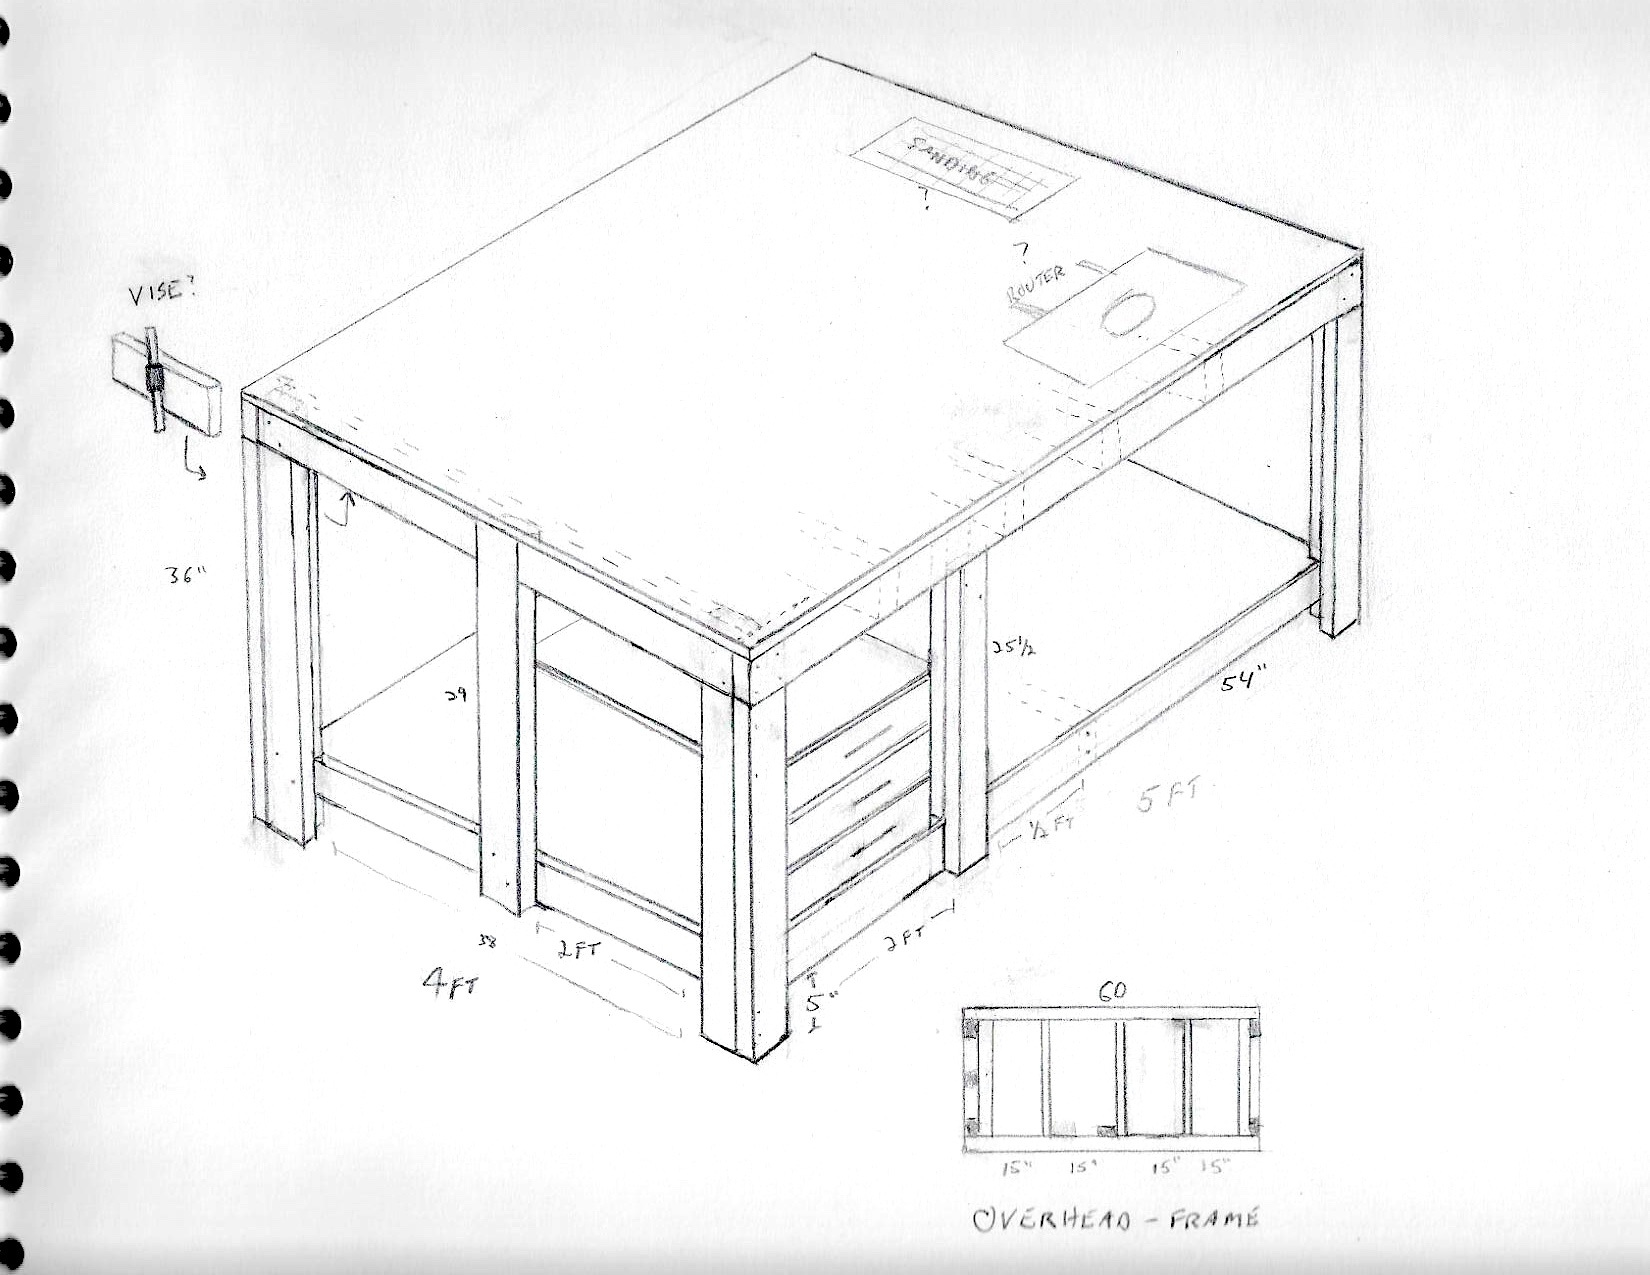
Most workbenches you can buy commercially are only about 2 feet deep. I needed more than that, so I came up with a 4ft x 5ft design that can be put together with minimal tools and skills. It also offers a lot more clamping opportunities because all the sides are flush.
You can access the drawings and cut list here.
If you would like to support my page, please use the product links. Everything you need for this project is linked throughout the article. Thanks!!
It starts with the legs, which are three 2x4’s screwed together with one of them turned 90 degrees. The inner most piece extends 3.5 inches above the other two. This protrusion is where I attached the cross braces.
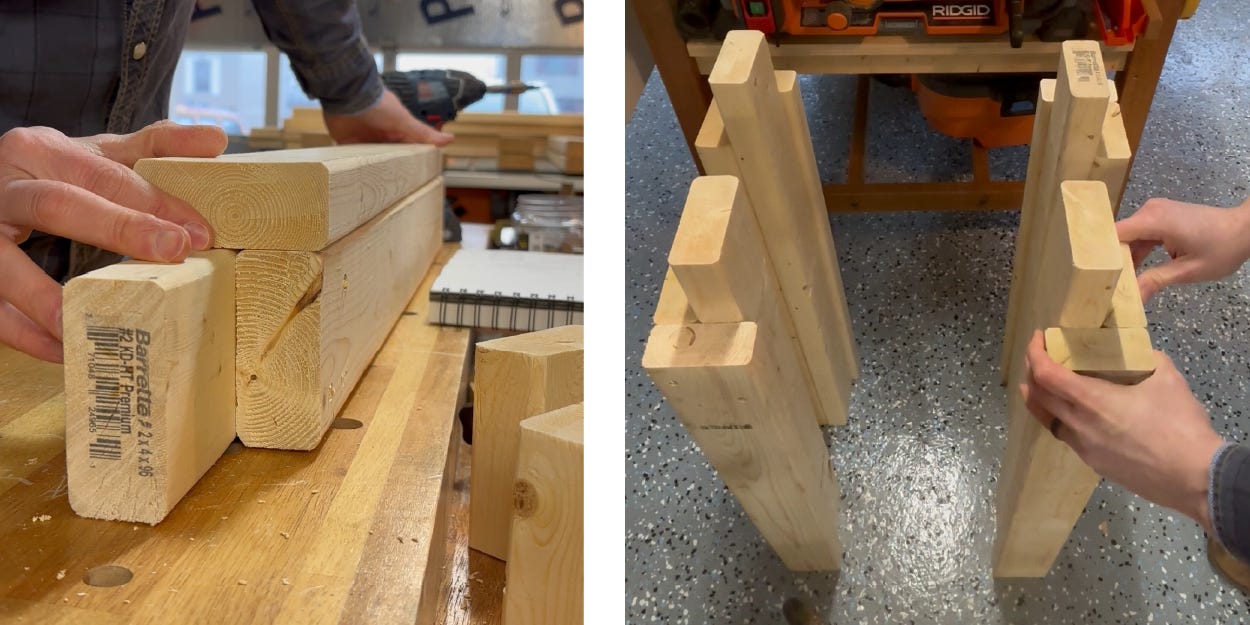
Essentially it’s a lap joinery system that doesn’t require any cutting or chiseling like you typically see with half-lap joinery. The 2 shorter pieces are 30.5“ and the longer piece is 34.”
Bonus, the legs stand up on their own. To attach the cross braces, you can just set them on top of the 30.5’s and screw them into place. I used 2.5 inch #9 construction screws, which you can find here.
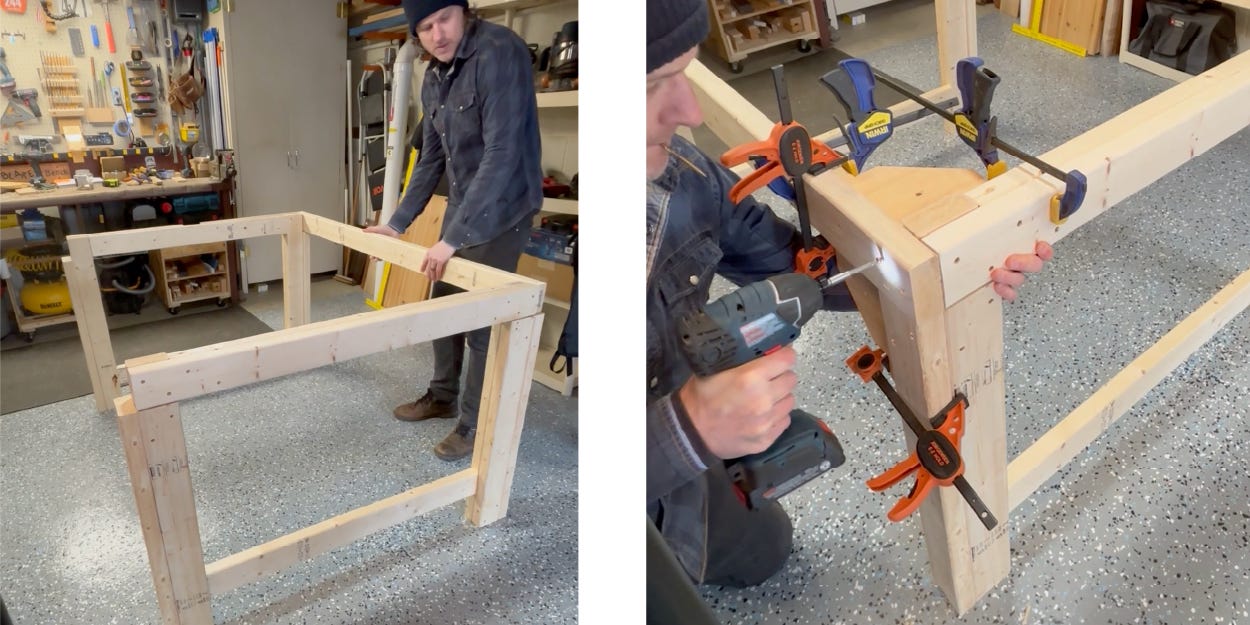
Above, you can see how the corners came together with the overlaps. I used a pair of corner clamping jigs to make them square, but those are not part of the final product.
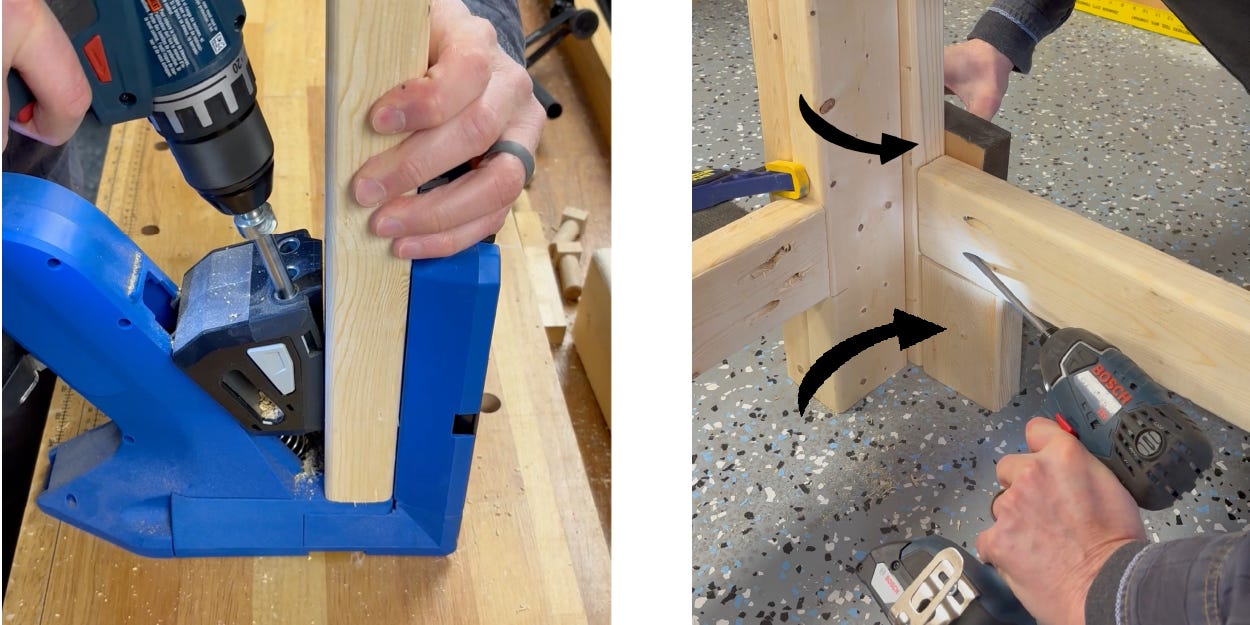
I attached the bottom stretchers using pocket holes. You can get an inexpensive pocket hole kit here, or you can toe in the boards using this method. The difference in my table is that the screws would go in the top and bottom of the board rather than the sides like the video showed.
Since the stretchers are suspended in midair, I cut a 5” block to set them on while screwing them into place. I also use a second block on the backside to keep them aligned with the posts. Please note that the plans here vary slightly from the video. The plans show both stretchers set back 1.5 inches from the face.
I used the same principle for the cross braces, clamping a board underneath the laterals so the braces could rest in place while attaching them. No need for toeing pocket holes here. You can drive them straight through the side.
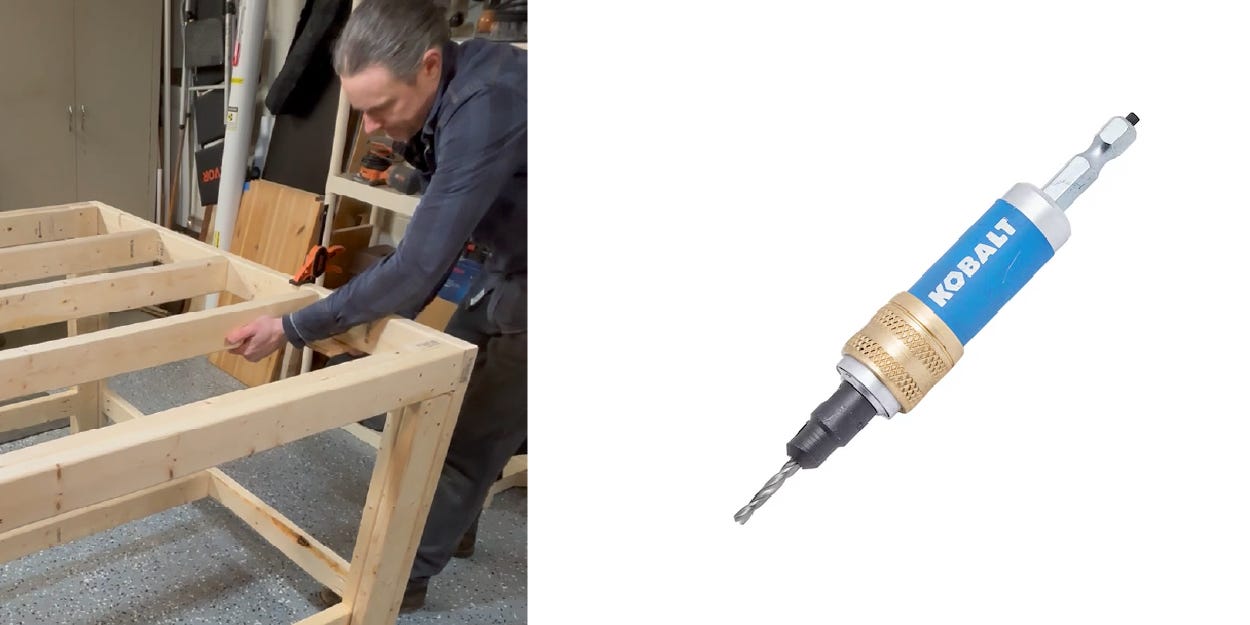
I always drill pilot holes to avoid splitting the wood. You can use an inexpensive countersink bit like this, or a combination bit like this.
I chose 3/4” MDF for the table top because it’s smooth and flat, and a lot less expensive than cabinet grade plywood, although it’s still not cheap. I mounted it from the underside using some corner braces I had left over from another project, but you could also use L brackets like these. Mounting from the underside saves holes in the surface. I would use at least 8-10 brackets. I plan to finish the top with tung oil and/or paste wax.
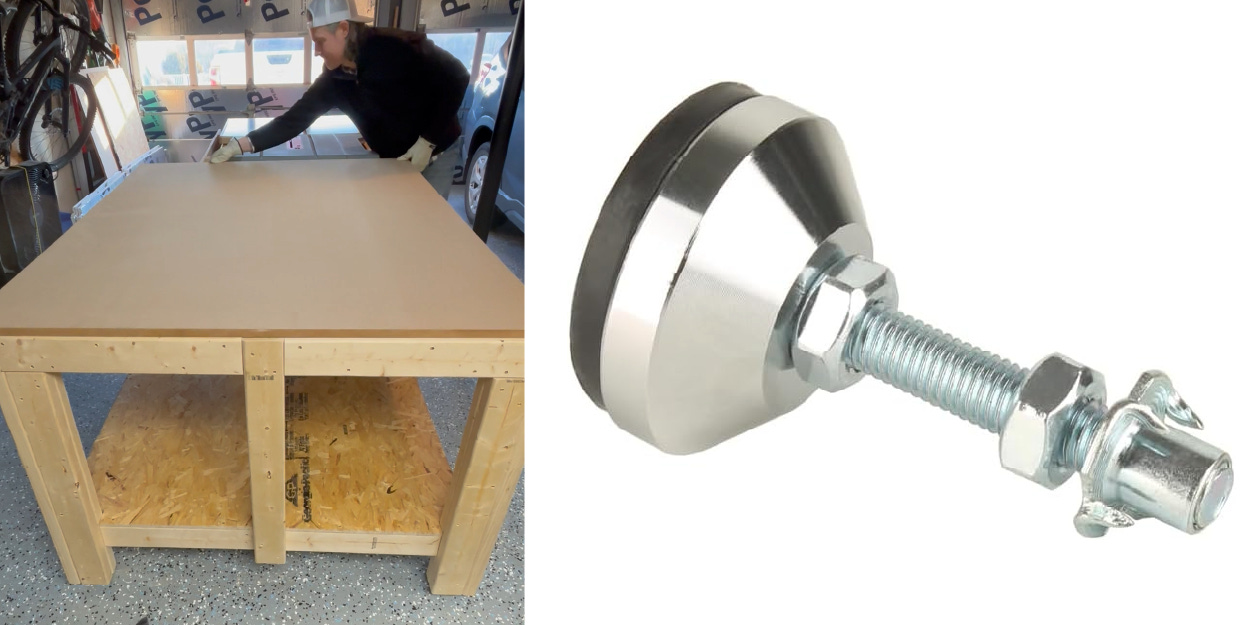
For the feet, I wanted the largest, sturdiest adjustable feet possible to prevent any movement from the table. These have actual rubber on the bottom, unlike many feet that are mostly plastic.
You’ll notice that I also have a couple extra vertical pieces. They will give me extra clamping surfaces when I’m using the table to work on things like doors and cabinet panels. Another big difference between this table and a lot of bench plans is there is no overhang. This will allow me to clamp things flush to the sides.
4’x5’ is the biggest table I could fit in my single car garage space. If you have room for it, this could easily be extended to 4’x8’ by leaving the cross members longer and adding another perpendicular cross brace or two. In that case, I would also recommend one additional leg in the center of the 8’ sides to avoid sagging over time.
Here’s a link to the drill I used.
Here’s a link to the impact driver.
Again, here’s a link to the drawings and cut list. Please note that I bungled the math in the video. The lumber was actually $49 (not $33), but the total of $147 is still accurate.
I’ll eventually add some bells and whistles like bench dog holes, T-slots, and hopefully a vise. Until then, see you on the next project!